
~OR~
How To Polish Up Your Pics
So with February right around the corner, and therefore February Photo Fest standing right at the curb (flashing the oncoming traffic), I thought I’d put together a brief photography tutorial for those of you who may be interested. For the purpose of simplicity, I am going to focus on a single (free!) online photo editing system: Lunapic.
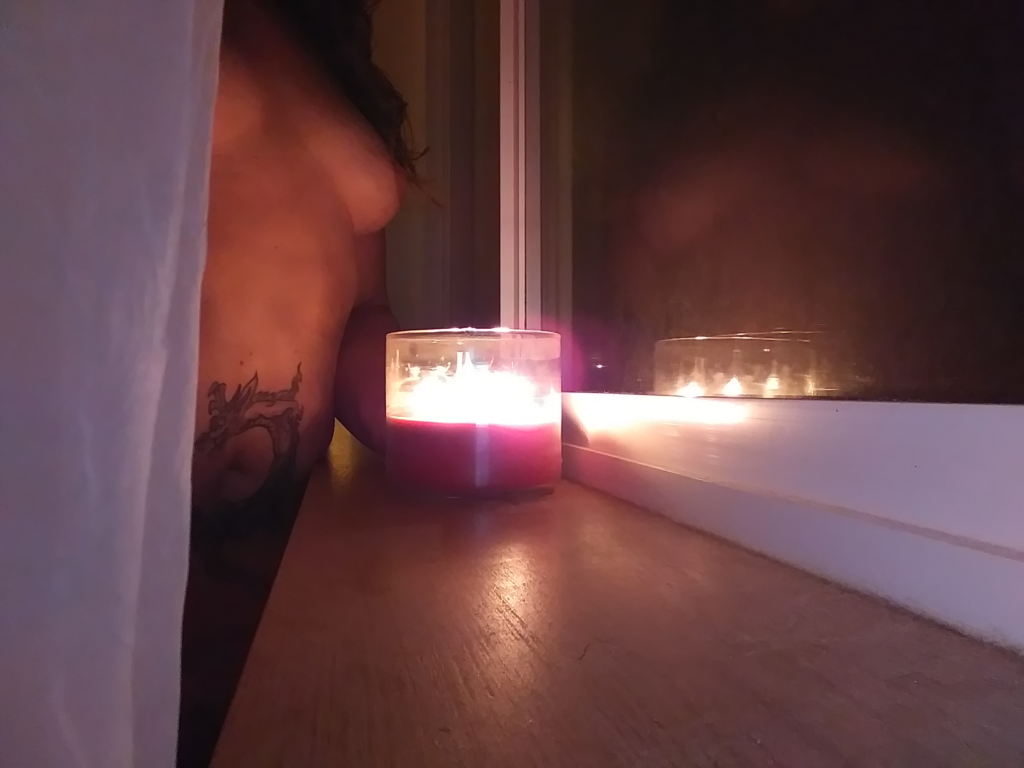
Step One: Load Photo
From the Lunapic home page, click ‘browse’ to upload your photo. I will be working with this photo:
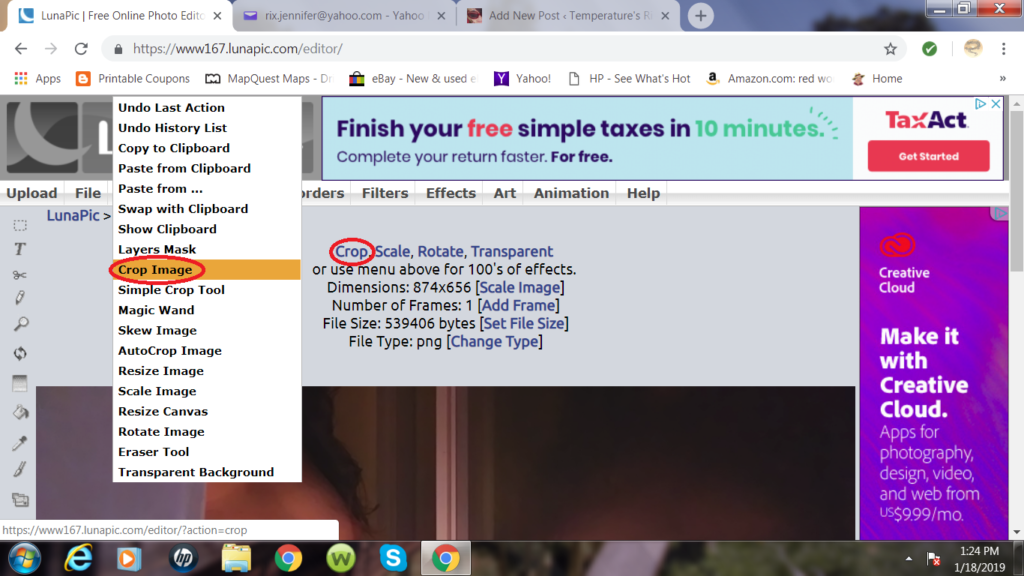
Step Two: Crop Image
Normally, I crop my photos in Paint (part of Microsoft Office suite on most computers); however, there is a crop function in Lunapic. To get to it, either click the blue ‘Crop’ link that populates once your photo is uploaded, or select Edit –> Crop Image.
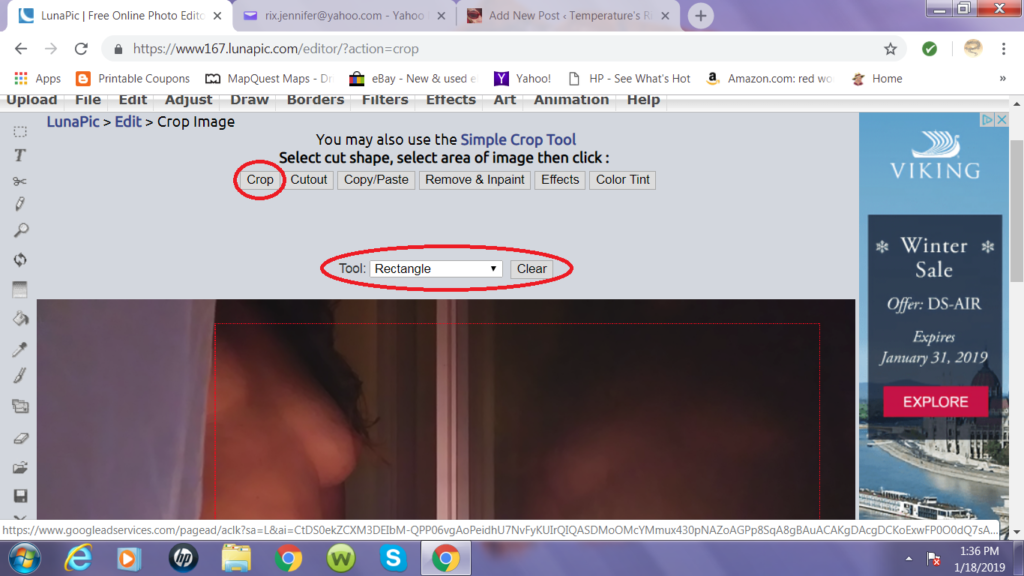
From the Crop screen, choose which shape you want to crop out from the drop-down menu. (Default is rectangle.) Then outline the area you wish to focus on and press the ‘Crop’ button.
Step Three: Minor Adjustments
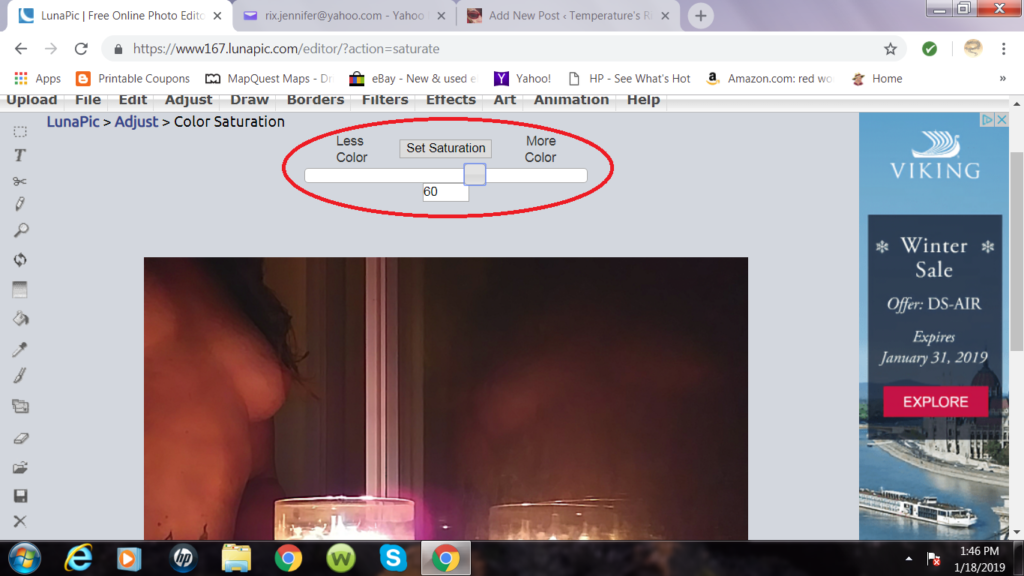
Since this photo contains a reflection, and reflections tend to be murky, I will sharpen the lines of the photo (Adjust –> Sharpen) then increase the color saturation (Adjust –> Color Saturation) to better bring out the reflective image.
Both options have adjustments available. I used the recommended auto-adjustment for sharpening, then manually adjusted the saturation to 60 using the slide bar, thus:
For these types of edit settings, you will see a preview of the changes you are attempting to make. Once you are satisfied with the previewed result, click to set the changes in place.
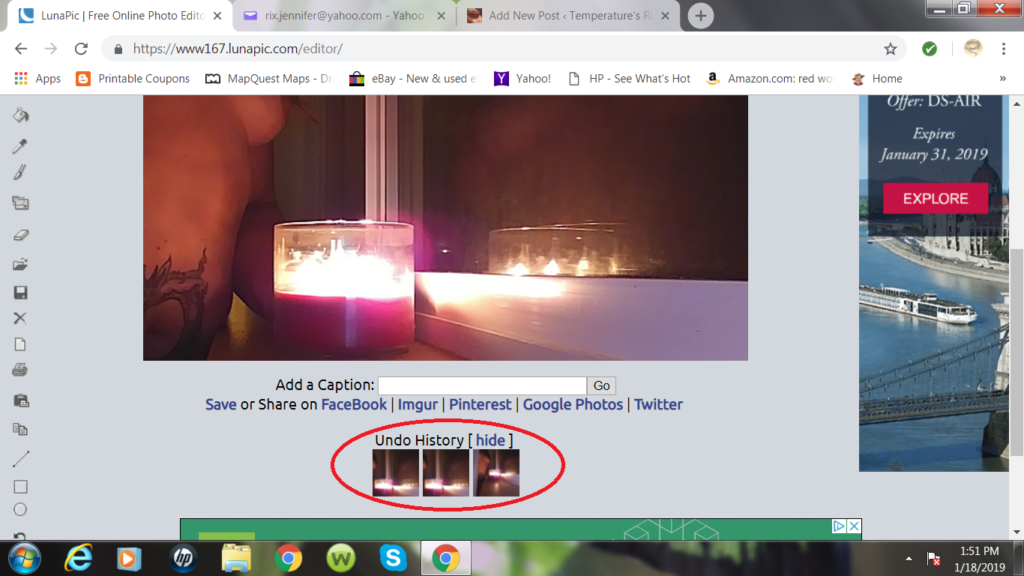
HINT: If you don’t like the result, you can always click ‘Undo This Effect’ on the following screen. Or, you can go back to any previous step in your editing process and re-start from there by clicking on any of the thumbnails that show under ‘History’.
Step Four: Further Futzing About
Explore under the Filters, Effects, and Art tabs for making further changes if you wish. Most of these edits are adjustable. The program will automatically set the edit to 100% but you can lower its intensity down to 1% using the sliding bar. Here is an example using Neon (Filters –> Neon):
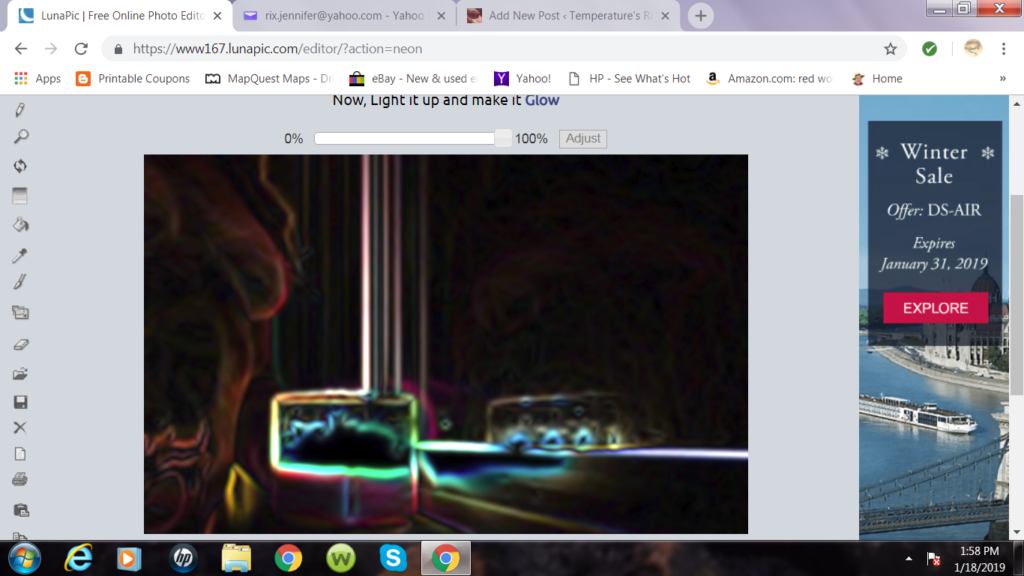
I like the glow, but would prefer that it be faint. Just enough to enhance the existing outlines in the photograph; not enough to overpower. So I adjust the percentage down to barely-there, like so:

NOTE: Neon is a *cold* light, so one of the reasons I like its effect on this photo is that it helps to un-glare the white windowpane without darkening the outlines or creating a yellowing or harsh-light result.
Step Five: Watermark
Once you are satisfied with the futzing-about bit, it’s time to watermark your photo. Go to Draw –> Watermark, then set your preferences. These are the ones I most often use:
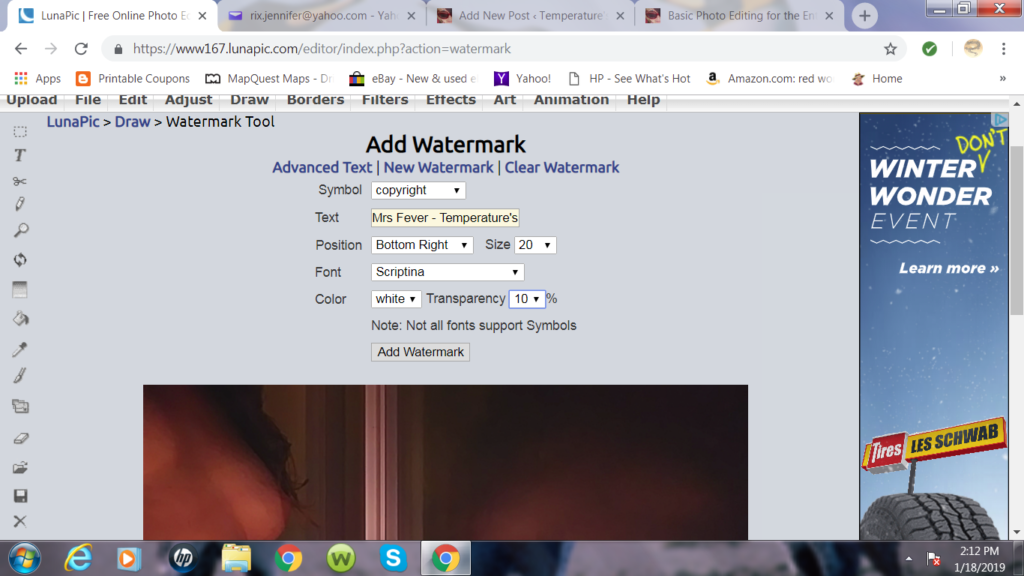
Which ends up looking like so:
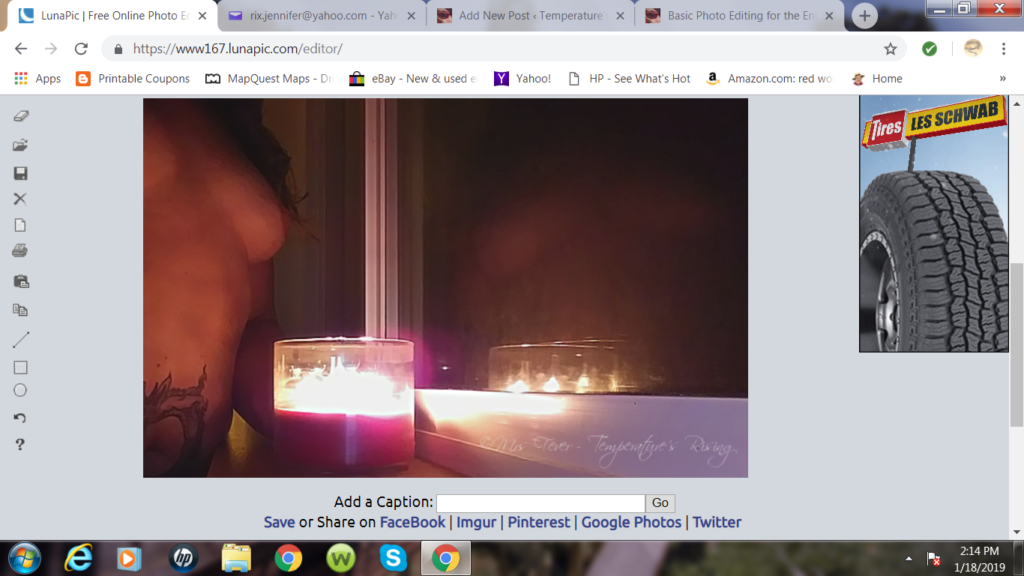
Step Six: Download, Upload, Publish!
When you’re satisfied with your watermark (it can be changed, undone, updated, etc — and you can also add multiple watermarks to the same photo or use the ‘Advanced Text’ option to use colored font), click the ‘Save’ button to download the photo in its finished form onto your PC (or tablet or phone or whatever). From there, you can upload it into your Media cache on your blog and publish it at will.
~ THE END ~
There are many photo editing programs and apps available. I’ve shown you *ONE* in this post, because it is free/multifunctional/the one I use most often. If you have recommendations and/or helpful hints for others, you’re welcome to make them.
And if you have any questions, please ask. Whether it’s about how a photo was taken (I use my camera phone *a lot* and this photo is a perfect example — it’s totally do-able to take hands-free photos with a phone!) or if/how a photo was edited or how to achieve a certain look/aesthetic, etc.: I do not pretend to be an expert, but I’ve spent the past 12 months teaching myself how to utilize the tools available to me (posting more photos on my blog was a personal goal I set for myself last year), so I may not have All The Answers, but I can probably lead you in the correct direction to find the answers for yourself. 🙂
I hadn’t heard of Lunapic so it’s a new app to explore. Thanks
Collaredmichael recently posted…Things That Make You Think.
I’ve had good luck with it so far. Have fun in your explorations! 🙂
I liked this, it sparked an interest in trying something different.
I do like to keep things simple so I’ve been using Paint for cropping and edging , and the text option, and using the MS Word photo editing thing for sharpening, contrast & color saturation. But I like your program’s option of a choice of several previous versions, vs only undo-ing the present one.
Most of my posts are just images so I’m gonna check out Lunapic, thank you.
Yay! I’m glad it sparked an interest. Have fun with it! 🙂
Pingback: Reflective ~ Temperature's Rising
Pingback: Apps & Snaps: Exploring Smart-Phone Photo Editing ~ Temperature's Rising
Nice photo editing. Its very informative. Thanks for share.
Pingback: Chills & Starts #SoSS #63 - Rebel's Notes
Hey, Thanks for providing the amazing list. The posts on your blog are having informative and valuable content.
My personal favorite editing tools is simplified.