
In-Phone Editing
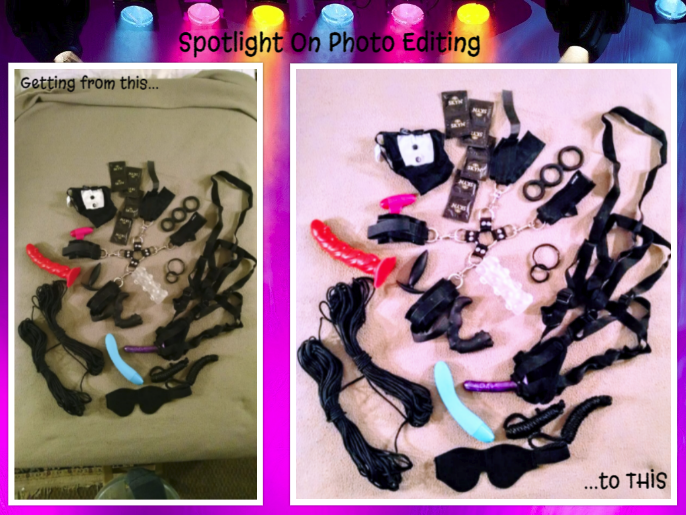
This week’s Wicked Wednesday prompt is ‘Explore’, and when I first saw it, I thought of all the different ways of exploring pleasure with a partner (to which the above illustration attests): sensory deprivation, anal explorations, vibrators, rope and other restraints, cock rings and sleeves, lingerie (which is not only for ladies, thank you!), prostate stimulation…
Anywhoo. The list goes on.
[Insert pause while y’all try to reconcile the header photo with the intro paragraph.]
…
And what, you are wondering, does any of this have to do with photo-ness, Feve?
Heh. I’ll tell you! 😉
So I started editing the photo I was intending use as a header image, all the while thinking of how to expound on the theme of Pleasurable Explorations, when – as I was editing the photo on my phone – I thought to myself:
“Self…”
(I sometimes talk to myself in the third person.)
“You should totally walk folks through HOW you got from Photo A to Photo B (i.e., from dark/grainy/greenish elongated original to clear/bright/cropped second copy).”
So since February Photo Fest is coming up soon, and because I thought other not-so-tech-brilliant bloggers (like me!) might benefit from it — not to mention the fact that I was already mentally waaay off track from my original point (this is a thing with me ~ it happens often) — I said:
“Yes! Let’s do THAT!”
And so here we are. 🙂
Pick a Photo, Any Photo
I have an inexpensive LG phone, so these are the options *I* see when I follow the steps below. Yours may differ slightly, but should still be there (if your phone is ‘smart’ and was produced after 2012). You may just have to explore.
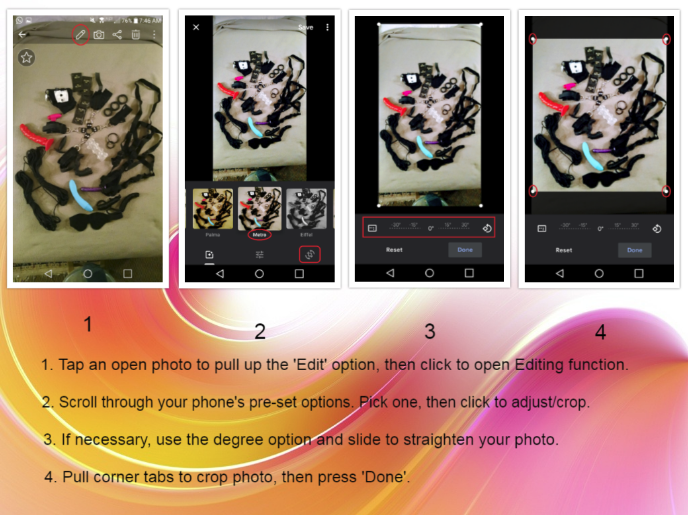
To get to your phone’s built-in editing app, you need to open a photo – any photo – then tap it again. You should see an icon — the settings wheel, a pencil, something that looks like magic stars, etc. Click on that.
From there, your phone may have pre-set options. I chose one from mine called Metro. It de-greens a photo and brightens the blue & red contrasts. If you don’t have pre-sets (though you probably do; my el-cheapo phone has them, so if you paid any kind of real money for your tech, I’m sure you have them too), don’t worry about it. You should still be able to adjust light and color.
Next, click the icon/instruction (there may be a three-dot menu button, depending on your phone model) for cropping/adjusting. Most phones nowadays also have the option to straighten a photo. For this example, it’s not necessary. However, I highly recommend it for any photo that contains a horizon line.
Once your photo is straightened, pull the corners downward/inward to crop as you please, then press ‘Done’.
On my phone, ‘Done’ takes me back to this screen, with the changes I made in place:
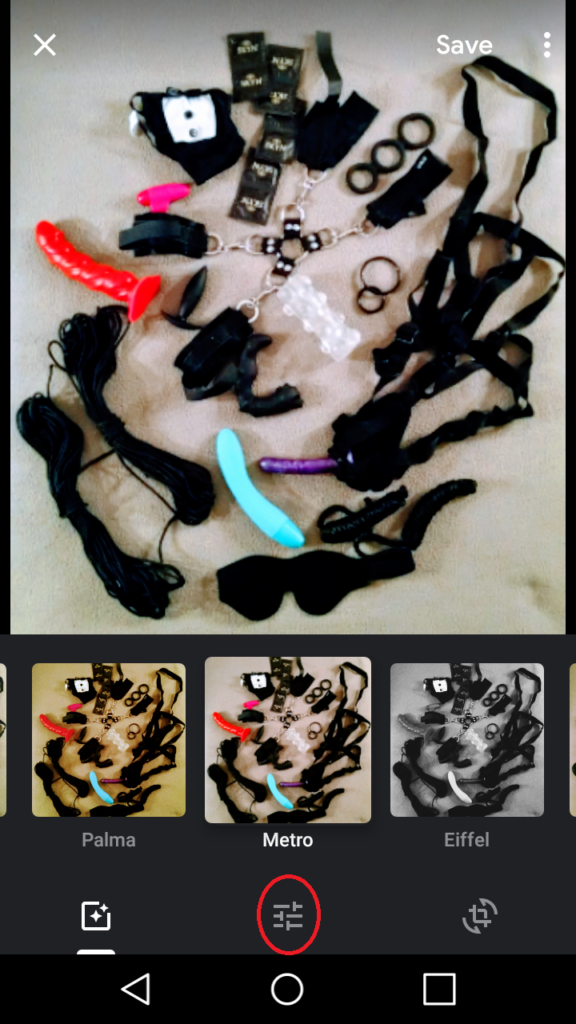
Light, color, and contrast (also sometimes termed ‘pop’) adjustment options are available by pressing the fret slider, indicated above. Your phone should have something similar; again, you may need to check your menu or click a different icon to get there.
I made my adjustments, as such:
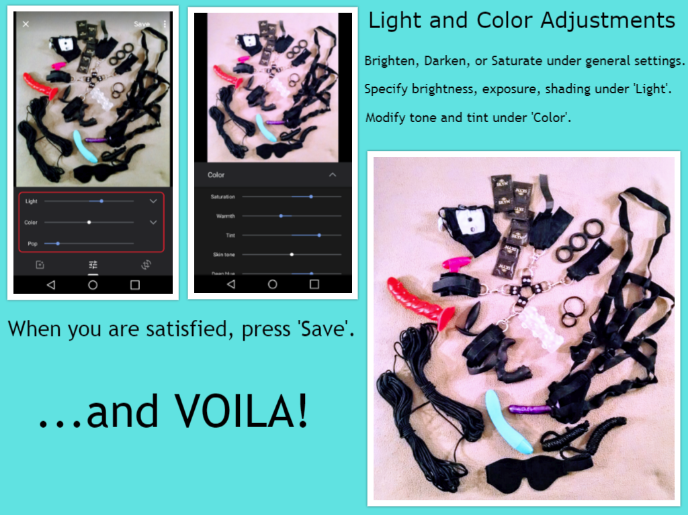
TIP: Many phones (mine included) will continually show the option to ‘Save’. I do not save until I’m completely finished editing a photo, because once it’s saved, it changes the original. If, as I did in this tutorial instance, you want to keep the original as is and also have an edited version: Take a screenshot before you begin, then edit the screenshot instead of the original.
Finishing Steps
Now that I have a much cleaner picture, I can use it as is -OR- I can further edit in my program of choice.
I did the latter, by sharpening the image and watermarking it. If you want to see how to do so for yourself, please see here.
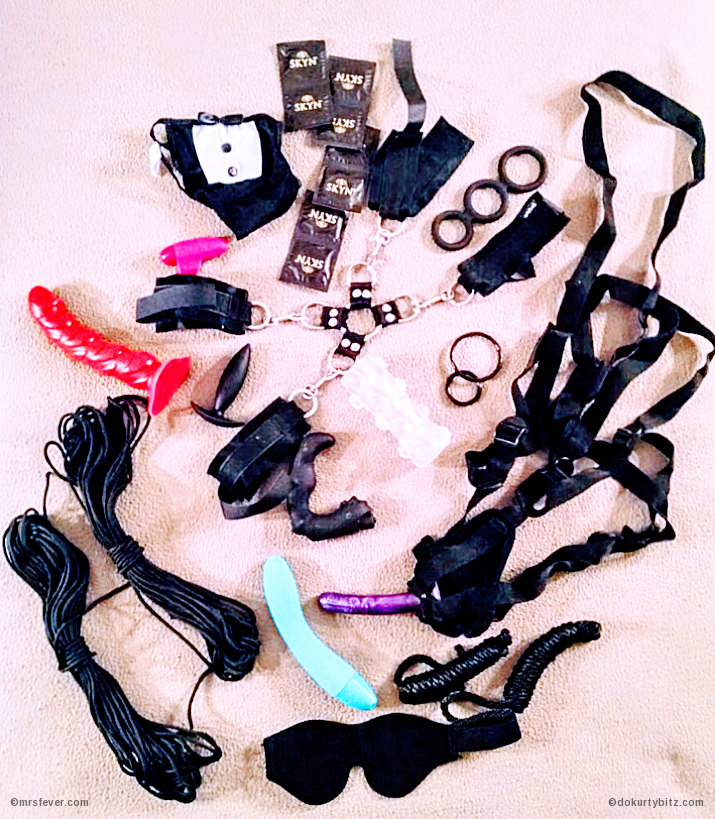
Annnd, in case you’re curious, the pleasure-exploration items found herein are as follows:
- Paracord
- Twisted Silicone Dildo
- Anal Plug
- Hogtie Restraints
- Finger-Sleeve Mini-Vibe
- Tuxedo Man-ties
- Non-Latex Condoms
- Triple Cock Ring
- Individual Cock Rings
- Masturbation Sleeve
- Lelo PicoBong Vibrator
- Prostate Stim
- Strap-On with Harness
- 6-ft Lengths of Nylon Rope
- Blackout Blindfold
Any questions? 😛

Oh Feve, I love these ‘how to’ posts of you! Thanks for sharing 🙂
Rebel xox
You are doing your best to help all those who are technically challenged become better at photography. A worthy goal. Worthy indeed!!
Collaredmichael recently posted…Quickies—Or The Tie That Binds!!
Well, being a Technologically Challenged sort myself, I kind of feel like I should share what I know. (Which is not much!) Maybe it won’t matter much in the broadscope, but then again, maybe it will be helpful to someone, somewhere. You never know. 🙂
I always like to find new apps, and new posts!
Voila !!!!!!!! It’s like Feve-Magic !
Move over, Houdini!
I guess I should write some of these guides as well if people are interested
Mollyx
Molly recently posted…Great Explorations
It’d be great if you would. 🙂
Pingback: Chills & Starts #SoSS #63 - Rebel's Notes